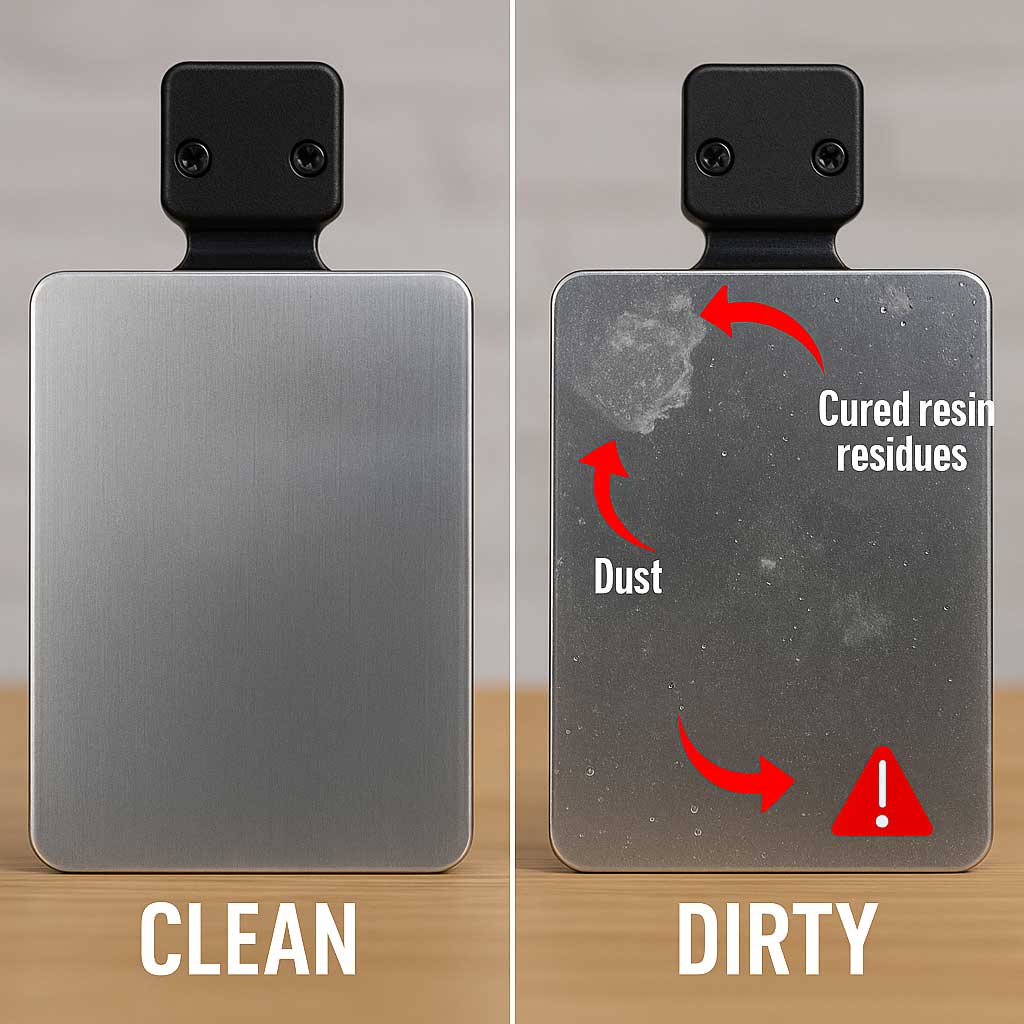
Why Cleaning the Build Plate Matters
When it comes to resin 3D printing, maintaining a clean build plate is one of the most crucial steps for print quality and printer longevity. Many users search for how to clean 3D printer plate, especially when facing failed prints, poor adhesion, or surface imperfections.
It’s worth noting that in FDM printers, the surface is commonly called the “3D printer bed,” while in resin 3D printers, it’s typically referred to as the build plate. While both need cleaning, the techniques and materials differ significantly due to the nature of resin-based printing.
Understanding the Resin 3D Printer Build Plate
In resin 3D printing, the build plate is mounted upside down, with the model being printed layer-by-layer from the bottom of the resin vat upward. This inverted printing method enables high detail and smooth finishes, but it also means the first layer must stick firmly to the build plate—making cleanliness absolutely essential.

What Can Go Wrong If the Build Plate Isn’t Clean?
- Poor adhesion:The first layer may not stick to the plate.
- Print failure:Parts can peel off during printing.
- Surface flaws:Dust or cured resin can leave marks on the print.
- Printer wear:Excess cured resin can interfere with movement or sensors.
Tools You’ll Need
Before diving into the cleaning steps, gather the following:
- Isopropyl Alcohol (90% or higher)
- Plastic scraper or spatula
- Lint-free cloth or paper towels
- Gloves (nitrile recommended)
- Safety goggles (optional but recommended)
Safety Tip: Always wear gloves when handling uncured resin and cleaning chemicals.
Step-by-Step: How to Clean 3D Printer Plate (Resin)
Step 1: Remove the Build Plate
Turn off the printer and carefully unscrew or release the build plate. Allow any uncured resin to drip back into the vat before removal.
Step 2: Scrape Off Excess Resin
Use a plastic scraper to gently remove any stuck-on resin from the plate surface. Avoid using metal tools to prevent scratches.
Step 3: Rinse with Isopropyl Alcohol
Submerge or wipe down the plate with 90%+ IPA. This dissolves uncured resin and clears the surface.
Step 4: Dry with Lint-Free Cloth
Wipe the plate dry using a lint-free cloth or paper towel. Ensure no fibers are left on the surface.
Step 5: Inspect for Cured Resin or Film
Hold the plate under a light source and inspect for leftover cured resin. Repeat cleaning if necessary.
Pro Tips to Maintain Your Build Plate
Clean after every print to prevent buildup.
Avoid water—resin residue is not water-soluble.
Level the plate again after reinstalling.
Use a dedicated container for IPA if you clean regularly.
Conclusion: Keep Your Prints Flawless
A clean build plate is key to successful, high-quality prints. By following these steps on how to clean 3D printer plate, especially for resin printers, you’ll avoid failed prints, improve part adhesion, and extend the life of your printer.
