In resin 3D printing, achieving consistent, high-quality results is often a delicate balance of various factors. While resin type, exposure settings, and ambient conditions play their part, the foundational elements of auto-leveling (or platform leveling) and Z-axis accuracy are paramount. These two aspects dictate how precisely each layer is formed and stacked, directly influencing the final print’s dimensional accuracy, surface finish, and overall success rate. For industries like dental, jewelry, and manufacturing, where precise dimensions and reliable output are non-negotiable, understanding and optimizing these factors is crucial.

The Auto-Leveling System Explained
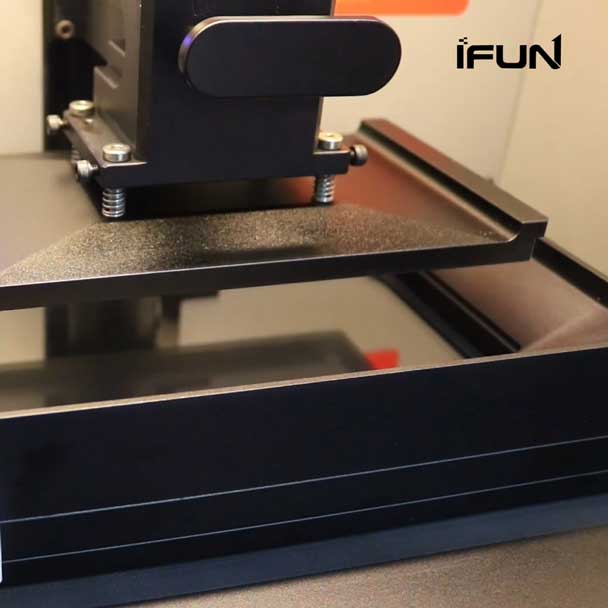
Auto-leveling in a resin 3d printer refers to the system’s ability to automatically detect and calibrate the parallelism and precise distance between the build plate and the LCD screen (which projects the UV light through the FEP film at the bottom of the resin vat). This process establishes the critical “zero” point for the Z-axis of your 3d printer.
Different Auto-Leveling Technologies
While the core goal is the same, different printers employ various technologies for auto-leveling:
- Touch Sensors/Mechanical Switches: A physical probe or the build plate itself contacts a switch or sensor, signaling the printer that it has reached the “zero” position. This is a straightforward and reliable method.
- Pressure/Force Sensors: The build plate gently presses down on the FEP film (often with a release sheet or paper in between), and a force sensor detects the pressure, indicating proper contact.
- Capacitive Sensing: Some more advanced systems use capacitive sensors that can detect the proximity of the build plate without direct physical contact, offering a potentially cleaner and less intrusive leveling process.
- Vision Systems (less common): In highly specialized or industrial machines, cameras might be used to analyze the parallelism and distance, providing extremely precise feedback for 3d printer z axis calibration.
Auto vs. Manual Leveling: Pros and Cons
| Feature | Auto-Leveling | Manual Leveling |
| Effort | Minimal; press a button and let the printer do the work. | Requires user intervention, adjustments, and often feeler gauges or paper. |
| Precision | Generally very high due to sensor accuracy and repeatability, aiding 3d print z axis calibration. | Depends heavily on user skill and attention to detail; can be inconsistent. |
| Consistency | High, as it removes human error from the equation. | Variable, prone to slight deviations each time. |
| Learning Curve | Low, ideal for beginners. | Higher, requires understanding of the process and patience. |
| “Set and Forget” | Closer to a “set and forget” experience once calibrated. | Often requires re-leveling more frequently, especially after print failures or maintenance. |
Is Auto-Leveling “Omnipotent”?
While auto-leveling significantly simplifies the 3d printing z axis process and boosts reliability, it’s not a magic bullet. It primarily ensures the initial levelness of the build plate. It doesn’t compensate for:
- Damaged FEP Film: A wrinkled or stretched FEP can still lead to print adhesion issues, even with a perfectly leveled plate.
- Warped Build Plates: While auto-leveling can establish a Z-offset, a severely warped build plate might still struggle with uniform adhesion across its entire surface.
- Resin Viscosity or Temperature: These factors also influence first-layer adhesion and resin flow.
- Incorrect Exposure Settings: Even with perfect leveling, incorrect exposure times will lead to print failures.
The Role and Impact of Z-Axis Accuracy
The Z-axis is the vertical backbone of your resin 3d printer, responsible for lifting the build plate precisely after each layer is exposed and then lowering it to the exact height for the next. The accuracy of this movement is paramount for dimensional consistency and print quality. Each layer, often as thin as 20 to 100 micrometers (), relies on the 3d printer z axis moving that exact distance repeatedly.
Factors Influencing Z-Axis Accuracy
Several components and design choices dictate Z-axis accuracy:
- Lead Screw Precision (Backlash): The 3d printer z axis screw, driven by the stepper motor, moves the build plate up and down. Any backlash (play or looseness) in the screw and nut mechanism can cause slight vertical inconsistencies, leading to variations in layer thickness. High-quality 3d printer z axis screw with anti-backlash nuts minimize this issue.
- Stepper Motor Control: The stepper motor’s ability to move in precise, repeatable steps directly affects 3d printing z axis accuracy. The motor driver and the printer’s firmware control microstepping, which divides each full step of the motor into smaller increments, allowing for finer control of movement.
- Z-Axis Guide Rail Stability: The build plate moves along guide rails. If these rails are flimsy, misaligned, or have play, the build plate can wobble or tilt slightly as it moves, leading to “Z wobble” or “ghosting” (faint repetitions of features on the print surface).
- Build Plate Attachment and Gantry Rigidity: How securely the build plate is attached to the 3d printer z axis gantry, and the overall rigidity of the gantry itself, also play a role. Any flex or looseness here can translate into inaccuracies.
Common Z-Axis Issues and Their Manifestations
- Rough Layer Lines / Z-Banding: This is the most common sign of Z-axis inconsistency. Instead of smooth, uniform layers, you see distinct horizontal lines or bands where layer thickness has varied.
- Inconsistent Print Height: If your 100mm tall print consistently comes out as 99.5mm or 100.5mm, it’s a strong indicator of a systemic 3d print z axis accuracy problem.
- Stretched or Compressed Fine Details: Small features, especially those oriented vertically, can appear stretched or compressed if the Z-axis isn’t moving with uniform precision. For example, a small pillar might look squatter or taller than designed.
- “Elephant Foot” (exacerbated): While often an exposure issue, poor initial Z-offset combined with slight 3d print z axis inaccuracies can worsen the “elephant foot” effect, where the first few layers spread out wider than the rest of the print.
- Delamination: In extreme cases, severe Z-axis inconsistencies can prevent proper layer adhesion, leading to delamination where the print splits apart horizontally.
Improving Z-Axis Accuracy
Manufacturers continuously work on improving Z-axis accuracy:
- Dual Linear Rails: Many higher-end printers use two linear rails instead of a single one, providing significantly more stability and reducing wobble.
- Anti-Backlash Lead Screws: Specialized nuts designed to eliminate play in the 3d printer z axis screw contribute to more precise vertical movement.
- High-Quality Stepper Motors and Drivers: Better motors and advanced microstepping drivers ensure smoother and more accurate step control.
- Rigid Frame Design: A sturdy and well-built printer frame minimizes vibrations and ensures that 3d print z axis movements are translated faithfully.
How They Influence Print Consistency
Auto-leveling and Z-axis accuracy are not isolated features; they work in tandem.
- Auto-leveling provides the perfect foundation: It ensures that your very first layer adheres perfectly and is evenly cured across the entire build plate. Think of it as laying the first brick of a wall perfectly straight.
- Z-axis accuracy ensures perfect stacking: Once that first layer is down, the 3d printer z axis precisely lifts and lowers the build plate for every subsequent layer, ensuring each “brick” is placed at the exact correct height.
Consider this scenario:
- Poor Leveling + Good Z-axis Accuracy: Your first few layers might adhere unevenly or be squished, leading to an “elephant foot” on one side, even if subsequent layers are perfectly uniform. The entire print might then peel from one side.
- Good Leveling + Poor Z-axis Accuracy: Your initial layer will be perfect, but as the print progresses, inconsistent 3d printing z axis movement will lead to rough layer lines, height inaccuracies, or even delamination, despite that perfect start.
Only when both are optimized—a perfectly leveled initial layer and consistently precise 3d print z axis movement for every subsequent layer—can you achieve true print consistency in terms of dimensional accuracy, smooth surface finish, and reliable success rates.
Application Advice and Optimization Strategies
When investing in a resin 3d printer, don’t just focus on the “K” (resolution) numbers. Pay close attention to specifications related to mechanical stability and precision:
- “Z-axis repeatability” or “Z-axis positioning accuracy”: Look for numbers like “±5µm” or lower, indicating how consistently the 3d printer z axis can return to a specific height.
- Lead screw type and guide rail configuration: Dual linear rails and anti-backlash 3d printer z axis screw are strong indicators of better Z-axis stability.
- Auto-leveling mechanism: Understand the technology used and its reputation for reliability.
Testing and Diagnosis
- Leveling Test Prints: Many slicers offer specific “leveling test” models (often a thin, flat square). Print these to observe adhesion uniformity across the entire build plate. Any areas that don’t stick or lift indicate leveling issues.
- Calibration Prints for Z-axis: Print a tall, thin test tower or a calibration cube and measure its height precisely with calipers. Compare it to the designed height. Significant deviations point to 3d print z axis calibration or scale issues. Also, visually inspect for Z-banding or ghosting on the smooth sides of the print.
- Visual Inspection: Regularly inspect your 3d printer z axis screw for debris, and your guide rails for wear or stickiness. A well-lubricated and clean Z-axis system is crucial.
Diagnosis Flow for Print Failures:
- Is it a first-layer adhesion issue (nothing sticking, print peeling off the plate)? This often points to leveling problems (incorrect Z-offset), insufficient bottom exposure time, or temperature issues.
- Are parts of the print consistently failing or delaminating higher up, or are there severe horizontal lines/banding? This suggests Z-axis accuracy issues, insufficient normal exposure time, or resin property problems.
- Is the entire print distorted or warped in ways unrelated to its geometry? This could be a combination of issues, including poor leveling, Z-axis problems, or inadequate support structures.
Conclusion
The pursuit of consistent, high-quality resin 3D prints begins with a solid foundation. While advanced features and high resolutions are appealing, the often-overlooked yet critical aspects of platform auto-leveling and 3d printer z axis accuracy are the bedrock of reliable production. A 3d printer that can consistently provide a perfectly flat starting point and then precisely stack each subsequent microscopic layer will deliver results that are dimensionally accurate, visually appealing, and repeatable across batches. Prioritizing these fundamental mechanical capabilities over merely chasing higher resolution numbers will ultimately lead to a more successful and less frustrating 3d printing z axis journey.

