The Digital Revolution in Denture Fabrication
The field of prosthetic dentistry is undergoing a profound transformation driven by the digital revolution. Traditional denture fabrication, a meticulous and time-consuming process, has long been characterized by multiple patient visits, reliance on manual wax-ups, plaster models, and numerous try-ins. These conventional steps often introduce cumulative errors and prolong the patient’s delivery cycle, typically spanning 7 to 10 days.
In stark contrast, Digital Denture workflows, utilizing a sequence of scanning, Computer-Aided Design (CAD), and 3D printing dentures, promise rapid, precise, and predictable patient-specific prostheses. Among the various Additive Manufacturing technologies, vat photopolymerization techniques—specifically Digital Light Processing (DLP) and Liquid Crystal Display (LCD) printing—are emerging as the dominant methods for 3D printed denture production.
This article will detail the complete workflow of 3d printed dentures, from digital design to final delivery, and analyze how DLP/LCD technology significantly enhances clinical accuracy, efficiency, and patient outcomes.
Digital Design Stage: From Intraoral Scan to Denture CAD Model
The foundation of a successful digital denture is the acquisition of high-fidelity 3D data. This stage sets the precision benchmark for the entire process.
Data Acquisition: Data is typically collected through two methods: direct and indirect. The direct method involves using an intraoral scanner to capture the patient’s soft and hard tissue data in real-time, offering superior time efficiency and patient comfort by avoiding traditional impression trays that can induce gag reflexes and discomfort. Indirect methods involve scanning conventional impressions or plaster models. Studies confirm that both methods yield clinically acceptable data, but intraoral scanning provides immediate digital models, simplifying data storage and transmission while reducing the dimensional errors associated with traditional materials.
Design Software: The acquired data is imported into specialized dental CAD software, such as 3Shape Dental System or Exocad DentalCAD. These platforms enable the virtual design of the denture base, arch, and occlusal relationships. The design process is meticulous, involving anatomical adjustments, border line drawing, teeth arrangement, and occlusal space analysis.
Digital Try-in: The software allows for virtual try-in and occlusal adjustment, which significantly reduces the need for multiple physical try-in sessions. This ability to digitally refine the design before production is a major Clinical Insight, minimizing reworks and enhancing patient fit and adaptation.
| Process | Traditional Wax-up Design | Digital CAD Design |
| Time | 3 – 5 hours (Skilled technician required) | 1 – 2 hours (Software-assisted) |
| Error Source | Manual carving, thermal expansion/contraction | Software precision, scanner accuracy |
| Adaptation | Multiple chairside adjustments | Minimized chairside adjustments |
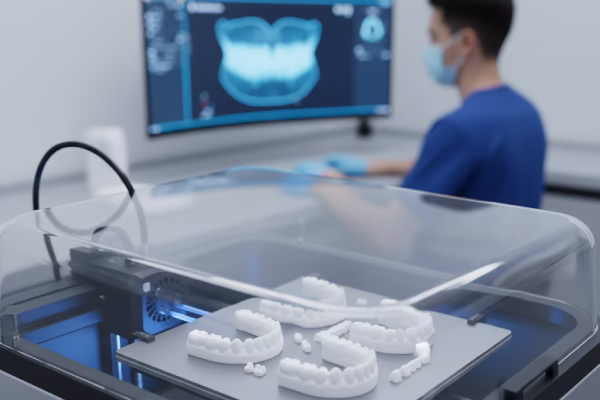
Printing Stage: Using DLP/LCD Printers for Full Denture Production
The move from virtual model to physical object relies on the efficiency and precision of photopolymerization. DLP and LCD technologies utilize face-projection principles, curing an entire layer simultaneously, which is a major advantage over the point-scanning of SLA.
Why DLP/LCD?
- Speed: Due to parallel curing, the printing speed is independent of the model’s complexity in the XY-plane, making it significantly faster than SLA, especially for batch production.
- Accuracy: DLP’s high light intensity and uniformity, delivered via a Digital Micromirror Device (DMD), along with the increasing resolution of LCD matrices (up to 4K/8K/12K/16K), enable the reproduction of fine details, with minimum feature sizes down to 50μm.
- Efficiency: They facilitate the batch printing of multiple denture bases or arches, offering substantial savings in labor and material costs.
- Printing Parameters: Successful 3d printing partial dentures or full dentures requires precise parameter control. Key settings include layer thickness (typically 50 – 100μm), normal exposure time (e.g., 12 seconds), and bottom layer exposure time (e.g., 80 seconds). The material’s viscosity and photosensitivity are critical; layer thickness must be less than or equal to the curing depth to prevent delamination and ensure strong interlayer adhesion.
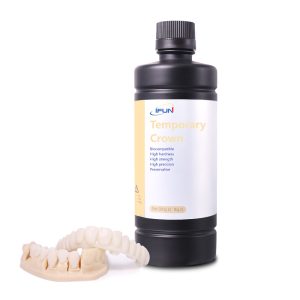
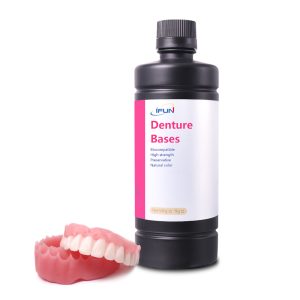
- Material Selection: Specialized materials, such as Denture Base Resin and Gingiva Mask Resin, are used, requiring careful performance matching and adherence to standardized temperature (15℃ – 35℃) and humidity (below 40% RH) conditions for optimal results.
Post-Processing and Curing: Strength and Dimensional Stability
The freshly printed “green state” denture requires essential post-processing to achieve its final mechanical and biological properties.
Cleaning and Post-Curing:
- Cleaning: Residual uncured resin is removed using Isopropyl Alcohol (IPA) to prevent surface deformation.
- Post-Curing: The part is then cured using a 405nm light source. This step is critical for ensuring complete polymerization, which can enhance mechanical properties (e.g., bending strength) by 30℃ – 50℃ and ensure biocompatibility.
- Dimensional Control: To overcome oxygen inhibition, which hinders surface curing and creates a sticky layer, advanced post-curing methods are employed, such as curing under a glycerol bath, water bath, or nitrogen environment. Proper cooling after curing (5 – 10 minutes) is also necessary to maintain Dimensional Stability and prevent warping or shrinkage errors.
Finishing and Polishing: Achieving Natural Aesthetics
The finishing stage is where the 3d printed denture transitions from a functional prototype to a naturally aesthetic restoration, comparable to traditional PMMA dentures.
This stage involves a meticulous process of grinding, polishing, and potentially staining. Adhering to the “coarse-to-fine, flat-to-shine” principle, technicians use specialized tools to achieve a smooth, high-gloss surface.
Aesthetic Optimization:
- Surface Texture: The goal is to achieve a surface roughness of Ra ≤0.025 μm for the oral-facing surfaces to ensure comfort and hygiene.
- Assembly: 3d printed denture teeth or prefabricated ceramic crowns can be bonded or nested onto the DLP-printed base.
- Color Matching: Techniques like resin blending and surface glazing are used to adjust transparency and color, ensuring the restoration harmonizes with the patient’s natural dentition.
Clinical Try-in and Delivery: Evaluating Fit and Function
The ultimate success of the digital workflow is measured by the Fit Accuracy and patient satisfaction during the clinical try-in.
Try-in Session: Thanks to the high precision of the digital design and printing process, the need for multiple adjustments is drastically reduced; often, only one try-in is necessary. The clinician systematically evaluates the marginal fit (ideally <100μm gap), occlusal relationship, and overall comfort.
Functional Testing: The assessment includes dynamic evaluation of chewing, speech performance, and stability. The precise control of the digital process typically results in printed dentures that exhibit superior marginal adaptation compared to conventional methods. Clinical Feedback overwhelmingly points to enhanced fitting efficiency and improved patient satisfaction.
Advantages of Using DLP/LCD Workflow in Denture Fabrication
The adoption of the DLP/LCD workflow offers a comprehensive set of advantages that justify the shift from traditional methods.
| Key Metric | Traditional Workflow | Digital DLP/LCD Workflow |
| Delivery Cycle | 7 – 10 days | < 3 days (potential same-day) |
| Accuracy (Fit Gap) | > 100 μm (Cumulative error) | 20 – 25 μm (High consistency) |
| Repeatability | Requires new impressions/models | Digital file ready for instant re-print |
| Efficiency | High labor cost, material waste | Automation, high material utilization |
| Data Management | Physical archives (storage issue) | Digital archive (CAD file storage) |
The technology enables a faster delivery cycle, high and stable precision, excellent material utilization, and efficient data archival for future repairs or replacements, significantly improving both clinical efficiency and the patient experience.
Challenges and Future Directions
While the technology is transformative, continued research and development are essential to address current limitations and realize its full potential.
Current Challenges:
- Material Durability: The long-term durability and color stability of current denture resins need further optimization to match PMMA.
- Standardization: There is an ongoing need for standardized procedures for printer calibration and post-curing equipment to ensure consistent, predictable results across different laboratories.
- Regulatory Compliance: Continued focus on biocompatibility research and compliance with standards such as ISO 10993 and FDA certification is paramount.
- Future Directions: The future points toward multi-material printing for integrated, customized properties; AI-assisted automated design for optimal arch and occlusal generation; and the development of next-generation materials like flexible gingiva resins and self-repairing materials to enhance the lifespan of the 3d printed partial dentures and full prostheses.
Toward Efficient and Personalized Denture Production
The integration of DLP/LCD 3D denture printing technology represents a paradigm shift in prosthetic dentistry. By creating a fully digital workflow—from intraoral scanning and CAD design to high-speed photopolymerization and post-curing—the process has become more efficient, more precise, and highly predictable.
For dental laboratories and clinicians, this is not merely an incremental improvement; it is a fundamental innovation that enhances clinical efficiency, reduces chair time, and most importantly, elevates the quality of care and patient experience. DLP/LCD technology is the driving force behind the move toward highly personalized denture production.