
Why is 3D Printing Dimensional Accuracy Crucial?
In jewelry casting, 3D printing resin shrinkage during lost-wax casting can lead to an average dimensional deviation of ±0.5 mm in metal parts. This significantly increases post-processing and modification costs, potentially adding up to 30% in extra expenses. In dental restoration, the issue is even more severe. Composite resin shrinkage, ranging from 1.7% to 3.7%, can cause marginal gaps in restorations, secondary caries, and even double the risk of restoration failure. Therefore, scientifically quantifying and controlling 3D printing resin shrinkage after curing is essential for ensuring the dimensional stability and functionality of the final product.

The Nature of Resin Curing Shrinkage
3D printing resin shrinkage during the curing process is an inherent characteristic driven by its polymerization reaction. Simply put, monomer molecules in liquid resin, under the influence of energy like light or heat, link together to form longer polymer chains, a process known as polymerization.
- Molecular Structure Changes Due to Polymerization:During polymerization, weak intermolecular interactions like van der Waals forces between monomer molecules are replaced by covalent bonds. Covalent bond lengths are typically shorter than intermolecular distances. Thus, when a large number of monomer molecules form a polymer network, the overall volume decreases.
- Thermal Stress and Internal Stress Release:The curing process is exothermic, leading to an increase in temperature. Upon cooling, the material deforms again due to thermal expansion and contraction. Simultaneously, internal stresses generated by the polymer chains during polymerization are gradually released after curing, leading to further dimensional changes.
Types and Manifestations of Shrinkage
3D print shrinkage primarily manifests in the following types:
- Volumetric Shrinkage:Refers to the overall reduction in material volume. This is the most direct form of shrinkage and the basis for other shrinkage types.
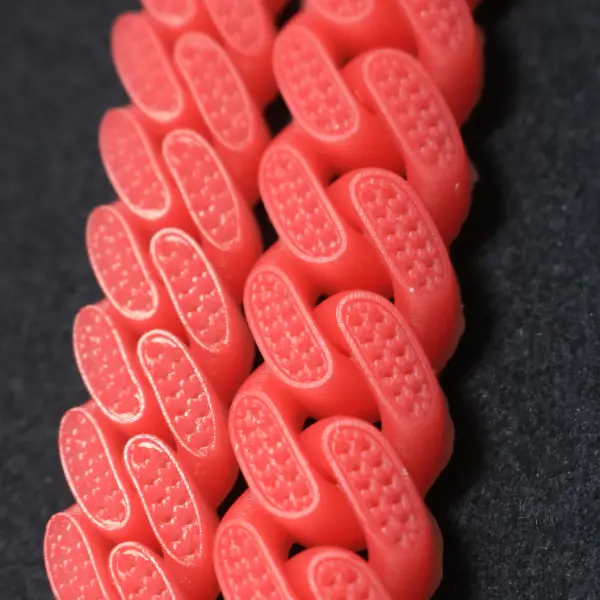
- Linear Shrinkage:Refers to the reduction in linear dimensions in a specific direction. This is the most intuitive shrinkage we observe in daily measurements. For example, a part originally 10 mm long might only be 9.9 mm after curing.
- Warpage/Distortion:Due to uneven shrinkage or the release of internal stresses, parts may exhibit bending, warping, or twisting, leading to irregular deformations. This type of deformation is particularly common in thin-walled or complex geometries.
| Type | Definition Formula | Example Scenario | Typical Impact Level |
| Volumetric Shrinkage | ΔV/V0=(ρ1−ρ0)/ρ1 | Internal voids in dental fillings | Up to 6% |
| Linear Shrinkage | ϵ=ΔL/L0 | Length/width deviation in jewelry casts | 0.5%-2.5% |
| Warpage/Distortion | σ=E⋅ϵ | Restorative margin warpage | Visually noticeable deformation |
How to Measure Shrinkage?
Accurate measurement of shrinkage is the first step toward effective control. Here are several commonly used measurement methods:
Method 1: Calibration Block Printing (Measuring Length, Width, Height Changes)
This is a simple and intuitive method.
- Design and Print Standard Calibration Blocks:Design a cube or cuboid with precisely known dimensions (e.g., 10×10×10 mm).
- Cure and Measure:Complete printing and curing according to preset curing parameters (including post-curing).
- Precise Measurement:Use high-precision calipers or a micrometer to measure the length, width, and height of the calibration block.
- Calculate Shrinkage:Linear Shrinkage (%) = ((Original Dimension – Measured Dimension) / Original Dimension) × 100%. For example, if the original length is 10 mm and the measured length is 9.95 mm, the linear shrinkage is ((10−9.95)/10)×100%=0.5%.
Method 2: Using Precision Calipers or 3D Scanning
- Precision Calipers:Suitable for measuring parts with regular geometric shapes. Advantages include ease of operation and low cost. Disadvantage is limited accuracy for complex curved surfaces.
- 3D Scanning:For obtaining shrinkage data of complex curved surfaces (like the occlusal surface of a dental crown), a 3D scanner offers significant advantages. Through point cloud comparison, its accuracy can reach an impressive ±5 microns, enabling very precise capture of tiny deformations and providing insights into surface resin shrinkage.
Method 3: Printing Standard Test Pieces (e.g., ASTM D695 Dimensional Pieces)
International standardization organizations (such as ASTM, ISO) have developed many standards for material performance testing. ASTM D695 is one such standard, used for measuring the compressive properties of plastics. Its prescribed “dog-bone” shaped specimens or square/circular test blocks are also commonly used to evaluate the dimensional stability of materials.
Operational Procedure:
- Design and print standard test pieces according to ASTM or other relevant standard requirements.
- Cure according to the environment and methods specified by the standard.
- Use precision measuring equipment (such as a displacement sensor on a universal testing machine or a high-precision measuring platform) to measure key dimensions.
- Calculate shrinkage or other dimensional deviation indicators based on the standard.
Analysis of Common Causes of Shrinkage
Understanding the causes of shrinkage helps us formulate effective control strategies for 3D print shrinkage.
- Resin Formulation Issues:
- High Monomer Content:Higher degrees of polymerization lead to greater changes in intermolecular distances, and shrinkage is typically more pronounced. Resins with a large amount of small monomer molecules often have higher shrinkage rates.
- Mismatched Curing System:The type and content of curing agents and photoinitiators can affect the efficiency and uniformity of the polymerization reaction, thereby influencing shrinkage.
- Uneven Curing:
- Uneven Light Intensity:During printing, if light intensity is unevenly distributed in different areas, it can lead to localized under-curing or over-curing, resulting in internal stresses and exacerbating shrinkage.
- Improper Print Parameter Settings:Layer thickness, exposure time, and lift speed all affect the degree and uniformity of curing for each layer.
- Over- or Under-Post-Curing:
- Insufficient Post-Curing:If post-curing time or intensity is insufficient, a large number of unpolymerized monomers remain within the resin. Over time, these will continue to polymerize, leading to subsequent dimensional changes (secondary shrinkage).
- Excessive Post-Curing:Over-curing can lead to excessive internal stress within the material or even material degradation, thereby affecting 3D printing dimensional accuracy or mechanical properties.
Effective Shrinkage Control Strategies
To address the aforementioned causes, we can adopt the following strategies to effectively control 3D printing resin shrinkage:
Use Low-Shrinkage Resin Formulations
Choosing the right resin is key. The market offers resins specifically designed for low-shrinkage applications, which typically employ:
- Large Monomer or Prepolymer Molecules:To reduce changes in intermolecular distance during polymerization.
- Fillers:Adding inorganic fillers (e.g., silica, zirconia) can effectively reduce the curing shrinkage of resin while also increasing the material’s strength and rigidity.
- Ring-Opening Polymerization Monomers:Some monomers undergo a ring-opening reaction during polymerization, resulting in relatively small volume changes.
- Consult Suppliers:When selecting resins, be sure to inquire with suppliers about their products’ official shrinkage data and recommended uses to ensure 3D printing dimensional accuracy.
Precisely Control Exposure and Post-Curing Parameters
This is one of the most direct and effective methods to control 3D print shrinkage.
- Exposure Parameter Optimization:
- Exposure Time:Precisely adjust the exposure time for each layer based on resin characteristics and print layer thickness to ensure adequate resin curing, but avoid over-exposure.
- Light Intensity Uniformity:Ensure the printer’s light source is uniform, avoiding localized under- or over-exposure. Regularly calibrate the printer and check the uniformity of the DLP or LCD screen.
- Support Structure Design:Appropriate support structures help reduce part deformation during printing and ensure light reaches all parts uniformly.
- Post-Curing Parameter Optimization:
- Time and Temperature:Strictly follow the resin supplier’s recommended post-curing time, temperature, and light intensity.
- Environmental Control:Ensure uniform temperature inside the post-curing equipment, avoiding localized overheating.
- Staged Curing:For certain special resins or large parts, consider staged post-curing to gradually release internal stresses.
Rapid Sealing or Completion of Casting Within 48 Hours (for Casting Applications)
For applications like jewelry casting that require subsequent processing, time management is also crucial.
- Prevent Secondary Polymerization:After printing, insufficiently cured monomers can still continue to slowly polymerize in air or light, leading to further dimensional changes.
- Rapid Processing:If used for casting, it is recommended to clean and post-cure the printed part as soon as possible after printing, and complete the casting operation within one to two days.
- Proper Storage:If immediate casting is not possible, printed parts should be stored in a dark, cool, and dry environment to slow down further shrinkage and deformation. Some resins may require vacuum packaging or immersion in specific liquids for preservation.
Conclusion: Key Recommendations for Building a Highly Stable 3D Printing Workflow
Controlling 3D printing resin shrinkage is a systemic engineering effort that requires comprehensive optimization of “people, machine, material, method, and environment.”
- Understand Material Characteristics:Deeply understand the curing characteristics and shrinkage behavior of the resin you are using.
- Optimize Print Parameters:Through repeated trials and data analysis, find the optimal exposure and post-curing parameters for your printer and resin combination to achieve desired 3D printing dimensional accuracy.
- Precise Measurement and Monitoring:Regularly measure the dimensional accuracy of your printed parts and record data to identify problems and adjust strategies promptly.
- Environmental Control:Ensure stable temperature and humidity in the printing and post-curing environment.
- Continuous Learning and Improvement:As new materials and technologies emerge, continuously learn and update your knowledge and skills.
By comprehensively applying these strategies, you will be able to significantly enhance the dimensional stability of your resin printed parts, laying a solid foundation for your precision manufacturing applications.

