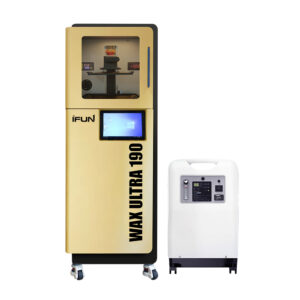
Calibrating your resin printer is one of the most critical steps to ensure successful 3D printing. This process, known as a resin exposure test, is essential for fine-tuning your resin calibration print settings. Because each resin has different characteristics, switching to a new resin—or even a different batch—requires recalibration to maintain consistent print quality.
This guide will walk you through how to calibrate exposure time using test models, ensuring your resin calibration prints are optimized for precision, strength, and reliability.
Key Concepts Behind Resin Calibration
Understanding the following fundamentals is important before running your resin exposure test:
- Normal Exposure Time: This is the duration of UV light for each layer. Too short results in soft, sticky, or incomplete prints, while too long leads to a loss of detail and brittleness.
- Bottom Layer Exposure Time: The first layers receive extra exposure (30-80s) to ensure strong bed adhesion.
- Layer Height: Thicker layers need longer exposure. A 0.05mm layer height is recommended for resin calibration prints.
- Resin Properties:
- (Critical Exposure Energy) and (Penetration Depth) affect how easily and deeply the resin cures.
- Value and viscosity influence flow and curing consistency.
- Color and transparency change light absorption—darker colors generally require longer exposure.
Preparing for a Resin Exposure Test
Make sure your printer is in good condition before running a calibration print:
- Check Resin Specs: Use manufacturer-recommended settings or start with slightly overexposed values.
- Printer Setup:
- Clean the build plate and resin vat.
- Inspect the FEP film for damage.
- Run a screen test to check for uniform UV light.
- Keep your workspace at 20–30°C for consistent resin behavior.
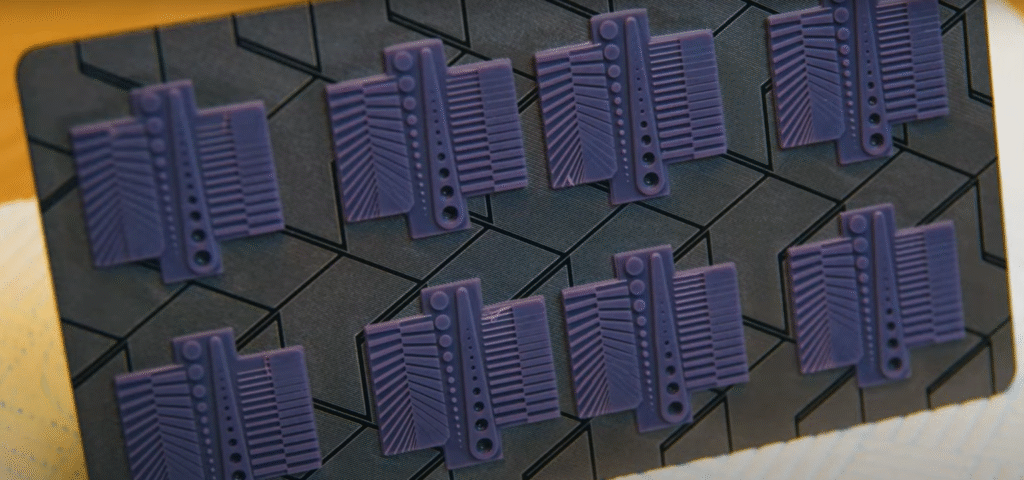
Using a Resin Calibration Print for Exposure Testing
A resin calibration print is typically a model designed with multiple zones or repeated parts, each printed with a slightly different exposure time. These allow you to compare results and choose the ideal setting.
Types of Calibration Models:
- Multi-zone Blocks: These have different exposure values in each section.
- Fine Detail Tests: These include columns, bridges, holes, and micro-text.
- Gridded Arrays: These feature multiple identical parts with varying exposure.
How to Perform a Resin Exposure Test:
- Choose or Create a Calibration Model: Use models designed for exposure testing, or duplicate simple test shapes with different exposure values.
- Configure Your Slicer Settings:
- Layer height: 0.05mm
- Bottom exposure time: 30–50s
- Bottom layers: 4–6
- Test range: Start from a median value and test s or s
- Assign Exposure Times: If your slicer allows per-model settings, set different exposure values directly.
- Print Your Resin Calibration Model: Ensure sufficient resin and monitor the print.
- Inspect the Results After Cleaning and Curing:
- Overexposed: Swollen detail, closed holes, brittle texture.
- Underexposed: Sticky surface, missing features, delamination.
- Perfect Exposure: Clean lines, sharp details, consistent strength.
- Fine-Tune: Adjust exposure in small steps (0.1–0.2s) based on visual and mechanical results.
Optimizing Calibration Further
Once your initial resin calibration print looks good, you can:
- Use the E10 formula as a reference if resin specs are available:
- Adjust mechanical settings for better consistency:
- Lift height: 6–10mm
- Lift speed: 2–5mm/s
- Retract speed: 4–7mm/s
- Light-off delay: 0.5–2s, depending on resin viscosity
- Compensate for environment:
- Cold conditions generally require longer cure times.
- An older LCD might have weaker UV output, necessitating longer exposure.
Troubleshooting Resin Calibration Prints
Issue | Likely Cause | Suggested Fix |
Print doesn’t stick | Bottom exposure too short | Increase bottom exposure time |
Details too soft | Under-exposed | Increase exposure by 0.5-1s |
Details too fat | Over-exposed | Decrease exposure by 0.5-1s |
Delamination | Lift speed too high | Reduce lift speed, increase exposure |
Sticky model | Insufficient exposure or cleaning | Rewash and increase exposure time |
Conclusion: Mastering Resin Calibration Prints
Using resin calibration prints and a proper resin exposure test procedure is the best way to refine your printer’s performance. Whether you’re working with a new resin or revalidating an old one, taking the time to calibrate ensures sharp details, strong adhesion, and better results.
Always record your ideal settings and repeat the resin exposure test periodically, especially when changing resin types, batches, or after extensive printer use.