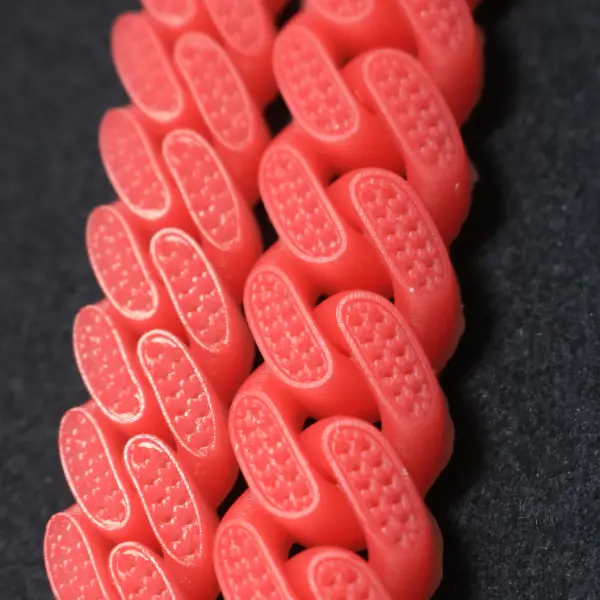
This article mainly discusses the reasons for the delay of resin 3D printers, including printing technology, hardware, materials, software, and system environment, and proposes corresponding solutions. It also analyzes common delay cases, such as baseplate adhesion failure, nozzle blockage, unreasonable parameters, and their resolution processes and time effects.
Reasons for the delay of resin 3D printers
(1) Printing technology level
- Influence of molding method
- Different 3D printing technologies have differences in printing speed. For example, SLA (stereolithography) is laser dot molding, while DLP (digital light processing) and LCD (liquid crystal display) are surface molding. DLP/LCD 3D printers scan a single piece, so the printing speed is faster than SLA. In resin 3D printing, if SLA technology is used, the printing speed will be relatively slow due to the way the laser solidifies the resin one by one, which may lead to overall printing delay.
- Layer thickness setting factor
- Layer thickness affects both printing speed and model quality. When printing a model, the thinner the layer thickness, the more layers are required to print a 3D model of the same height. This is because when the total height remains unchanged, a thinner layer thickness means that the printer needs to perform more layered printing. For example, adjusting the layer thickness from 0.2mm to 0.1mm may double the printing speed because the number of layers to be printed doubles. However, a thinner layer thickness will result in higher quality of the finished product, which requires a trade-off between speed and quality. Often, in order to ensure higher accuracy, thinner layers are chosen, resulting in longer printing time.
- Preset speed limit
- If the printer itself has a preset speed, the printing speed cannot exceed this set value. This is determined by the printer’s hardware and software. For example, some entry-level resin 3D printers will set the preset speed relatively low to ensure printing stability and accuracy, which will take more time when printing complex or large models.
(2) hardware related factors
- Sprinkler problem
- The durability of the nozzle is a common problem. When printing for a long time, the nozzle temperature may be unstable. If the temperature is not high enough, it will slow down the speed of dissolving materials, thereby reducing the printing speed. Just like in the printing process, the nozzle needs to melt and extrude the resin material. If the temperature cannot be maintained within the appropriate range, the fluidity of the resin will be affected, and the printing will become slow. Moreover, if there are foreign objects in the nozzle, such as small fragments or unmelted resin particles blocking the nozzle, it will also affect the extrusion speed of the resin, leading to printing delay.
- Building board related
- If the build board is not calibrated properly, various problems will occur and affect the printing speed. For example, if the build board fails to adhere and the parts do not stick to the build board, it is necessary to readjust the printing settings, which will waste time. It may be necessary to increase the exposure time of the bottom layer, increase the number of bottom layers, increase the waiting time before the bottom elevator, or reduce the lifting and retracting speed of the bottom layer to solve the problem. These operations will increase the overall printing time.
(3) Material factors
- Resin material properties
- Different resin materials have different curing characteristics. Some resins may require longer exposure times to fully cure. If such resins that require longer exposure times are used during the printing process, the curing time of each layer will increase, resulting in printing delays. For example, some resins with high toughness or high precision requirements will cure relatively slowly in the formula to ensure their physical properties.
- Material quality issues
- Poor quality resin materials may affect printing speed. Poor quality resin may have problems such as uneven composition and more impurities, which can lead to uneven or incomplete curing during the curing process. In order to ensure the quality of the model, the printer may automatically reduce printing speed or perform multiple repeated curing operations, thereby extending printing time.
(4) Software and file-related factors
- Slicing software settings
- When making a slice file, many parameters need to be set, such as layer thickness, number of layers, exposure time, bottom layer exposure time, light off delay, bottom layer light off delay, bottom layer lifting distance, lifting distance, bottom layer lifting speed, lifting speed, return speed, etc. If these parameters are set improperly, it will affect the printing speed. For example, if the exposure time is set too long, it will increase the curing time of each layer of resin, resulting in an overall printing delay; while if the bottom layer lifting speed is set too slowly, it will also increase the interval time between each layer printing, making the printing slower.
- Model file complexity
- The complexity of the model file to be printed has a great impact on the printing speed. Complex models, such as those with fine internal structures, a large number of suspended parts, or very thin walls, require more support structures and finer printing operations. When slicing software processes these complex models, it generates more instructions and operation steps, and the printer needs more time to execute these instructions. For example, a model with a complex internal lattice structure will greatly increase the printing time compared to a simple cube model.
(5) System and environmental factors
- Out of memory
- When printing complex models, a large amount of data is generated. If the printer system has insufficient memory, it cannot quickly cache and process this data. For example, some old resin 3D printers have small memory. When printing high-resolution and large models, data transmission and processing will become slow, just like running large programs will lag when the computer memory is insufficient, which will cause printing delays.
- Heat dissipation problem
- If the heat dissipation system of the printer is not good, during the long printing process, the temperature of the internal components may rise, which may trigger the printer’s protection mechanism and reduce the printing speed to prevent overheating damage. For example, the print head or light source may have unstable performance at high temperatures. In order to protect these components, the printer will automatically reduce the working speed, resulting in longer printing time.
the method to solve the resin 3D printer delay
(1) Optimize settings related to printing technology
- Choose the appropriate molding technology (if possible).
- If conditions permit, different printing technologies can be chosen. For those who pursue speed, DLP or LCD technology can be given priority because they are surface forming technologies, which are faster than SLA’s laser dot forming speed. For example, when making prototypes that do not require extremely high accuracy but require speed, DLP resin 3D printers can be used for printing. However, it should be noted that different technologies also have their own characteristics in terms of accuracy and cost, which need to be considered comprehensively.
- Adjust layer thickness parameter
- If the requirements for model accuracy are not very strict, the layer thickness can be appropriately increased to improve printing speed. Generally speaking, increasing the layer thickness from 0.1mm to 0.2mm may double the printing speed. However, it should also be noted that increasing the layer thickness may make the surface of the model rough and lose some fine details. In actual operation, trade-offs can be made according to the purpose of the model. For example, if a model is only used for appearance display, a slightly rough surface may be acceptable, and the layer thickness can be appropriately increased to speed up printing speed.
(2) hardware maintenance and upgrade
- Nozzle maintenance and replacement
- Regularly check whether the nozzle is blocked by foreign objects. If so, you can use specialized cleaning tools or solvents to clean the nozzle. For example, for the nozzle blocked by resin material, some mild organic solvents (under the premise of ensuring safety) can be used to dissolve the resin and clean the nozzle. If the durability of the nozzle is already poor and the temperature is often unstable, you can consider replacing it with a better quality and more durable nozzle. The new nozzle may have better heating performance and more stable temperature control, thereby improving printing speed.
- Building board calibration and optimization
- Make sure the build board is calibrated correctly. You can use the calibration tool provided by the printer or follow the calibration guide provided by the manufacturer. For example, some resin 3D printers have an automatic calibration function for the build board when turned on, so make sure this function works properly. If the build board is worn or uneven, consider replacing it or repairing it to ensure that the parts adhere firmly to the build board, reducing printing interruptions and readjustment time caused by build board problems.
(3) Selection and processing of materials
- Select high-quality resin materials
- Choose a reliable and reputable resin material supplier. High-quality resin materials usually have more stable curing characteristics and can be completely cured within a reasonable exposure time. For example, some well-known brand resin materials have undergone strict quality testing and optimized formulas, which are more reliable in printing speed and quality compared to some unknown small brand materials. When choosing resin materials, you can refer to the evaluations and test results of other users.
- Resin material pretreatment
- Before using the resin material, some pretreatment operations can be performed. For example, if the resin material has delamination or precipitation during storage, the resin can be restored to a uniform state by gently shaking or stirring (as recommended by the manufacturer). This can avoid curing problems caused by uneven resin during printing, thereby improving printing speed.
(4) software parameter adjustment
- Slicing software parameter optimization
- Reasonably adjust the parameters in the slicing software. For the exposure time, a time that can ensure that the resin is fully cured without being too long can be set according to the instructions and actual test results of the resin material. For example, if the recommended exposure time for the resin material is 8-12 seconds, you can start testing from 10 seconds and then make fine adjustments based on the printing results. For parameters such as the bottom lifting speed, the speed can be appropriately increased while ensuring the printing quality. At the same time, some slicing software has an automatic optimization function, which can be used to generate more efficient slicing files.
- Model optimization
- When conducting 3D modeling, some optimization operations can be performed on the model to reduce printing time. For example, for models with a large number of suspended parts, support structures can be added to make them more reasonable and concise. This way, the slicing software does not need to generate too many complex instructions to ensure the printing of suspended parts when processing the model. Moreover, in the design of the model, try to avoid overly complex internal structures or extremely thin walls, and simplifying the model structure can reduce printing time.
(5) System and environmental improvement
- Memory expansion (if possible)
- If the printer supports memory expansion, consider increasing memory. This way, when printing complex models, the printer can cache and process data more quickly, reducing printing delays caused by insufficient memory. For example, some high-end resin 3D printers allow users to add memory modules to expand memory, thereby improving printer performance.
- Improve heat dissipation conditions
- Ensure that the printer’s cooling system is working properly. You can clean the printer’s cooling fan and vent to prevent dust accumulation from affecting the cooling effect. If the printer’s cooling capacity is weak, consider adding additional cooling devices such as fins or small fans. This way, during the long printing process, the temperature of the internal components of the printer can be kept within the normal range, avoiding reducing printing speed due to overheating triggering the protection mechanism.
Analysis of common cases of delay in resin 3D printers
(1) Delay caused by build board adhesion failure
- Case situation
- When printing a small resin model, it was found that shortly after printing started, the model fell off the construction board. After inspection, it was found that there was some oil stains on the construction board, which affected the adhesion between the model and the construction board. In this case, the printer detects that the model is falling off or not adhering properly, stops printing on the current layer, and adjusts it again.
- Resolve process and time impact
- Firstly, it is necessary to clean the oil stains on the construction board, which can be wiped with specialized cleaning agents or alcohol. Then, recalibrate the construction board, increase the exposure time of the bottom layer from the original 10 seconds to 15 seconds, and increase the number of bottom layers from 3 to 5. These operations took about 30 minutes in total. After restarting printing, due to previous interruptions and readjustments, the entire printing process took about 1 hour longer than normal. Because in the case of failed adhesion of the construction board, the printer not only wasted some of the time that had already been printed, but also needed additional time to readjust printing parameters and restart printing some of the failed layers.
(2) Delay caused by nozzle blockage
- Case situation
- When printing a resin model with a complex internal structure, it was found that the amount of resin extrusion decreased during the printing process, and finally almost stopped extrusion. After inspection, it was found that some unmelted resin particles inside the nozzle were blocking the nozzle. This is because during the printing process, some impurities or uneven parts in the resin accumulate in the nozzle, causing the nozzle to be blocked.
- Resolve process and time impact
- The nozzle needs to be disassembled for cleaning. Special nozzle cleaning tools and some organic solvents are used to dissolve the blocked resin particles. This cleaning process takes about 45 minutes. After cleaning, the nozzle needs to be reinstalled and the distance between the nozzle and the build plate needs to be recalibrated, which takes about 15 minutes. Due to the blockage of the nozzle, the printing was interrupted. After restarting printing, the printing time of the entire model was extended by about 1.5 hours compared to expected. During the nozzle blockage, the printer was in a stagnant state, and after restarting printing, the previously unfinished parts needed to be reprinted. Also, since the nozzle has just been cleaned, it may take some time to stabilize the extrusion speed.
(3) Delay caused by unreasonable parameters of complex models and slicing software
- Case situation
- To print a resin model with a fine internal lattice structure and many suspended parts. Using the default slicing software parameters for printing, it was found that the printing speed was very slow. During the printing process, the printer often needs to pause to process complex structures, and the generated support structures are very complex.
- Resolve process and time impact
- Firstly, the model was optimized by simplifying the internal lattice structure in the 3D modeling software to reduce some unnecessary details. Then, the parameters of the slicing software were adjusted to reduce the exposure time from the original 12 seconds to 10 seconds, while optimizing the generation method of the support structure to make it more concise. These optimization operations took about 1 hour. After reprinting, due to the simplification of the model structure and the optimization of the slicing software parameters, the printing speed was significantly improved. However, due to previous attempts and optimization operations, the printing time of the entire model was still about 2 hours longer than the normal printing time of a simple model. Because complex models themselves require more time to print, even with optimization, previous failed attempts wasted some time.