
In high-end jewelry manufacturing, achieving a flawless surface is a technical requirement. While resin-based 3D printing offers incredible detail, the staircase effect—visible layer lines—remains a challenge. These imperfections can lead to increased metal loss during the polishing of cast pieces. This guide provides a professional 3D printing workflow for jewelers to achieve castable resin smoothness and eliminate visible textures.
1. Understanding the Root Cause: Why Are There Lines on My 3D Printed Rings?
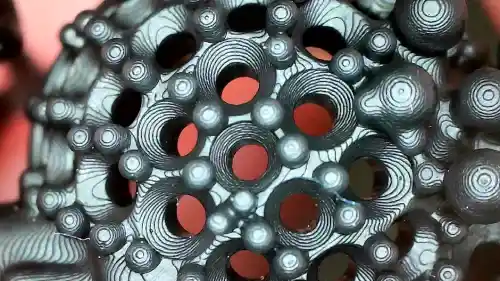
Layer lines occur because 3D printing is an additive process. Every model is built by stacking thin slices of cured resin. On curved or sloped surfaces, these slices create a “staircase” pattern. Additionally, XY Resolution affects surface quality; since LCD and DLP screens use pixels, the edges of a print may show microscopic vertical grids known as pixel lines.
- Staircase Effect: Caused by the vertical increment of layers (Z-axis).
- Pixelation: Caused by the fixed grid of the masking screen (XY-axis).
2. Hardware Choice: DLP vs LCD for Jewelry
When aiming for the best 3D printed jewelry surface finish, the technology you choose matters.
DLP (Digital Light Processing) is often preferred for jewelry because it uses a projector. This allows for voxel blending, which naturally blurs the edges of pixels, leading to a smoother finish compared to the sharp, square pixels of standard LCD printers. However, modern high-resolution (8K or 12K) LCD printers have narrowed this gap significantly by offering extremely fine XY resolution.
3. Jewelry 3D Printing Optimization: Slicing Parameters
Software settings are the most effective way to eliminate layer lines in resin prints. Refining these parameters reduces the need for manual labor later.
Layer Height Calibration
To get a smooth surface on resin 3D prints, you should reduce the layer height. For jewelry, the standard is usually between 25 and 35 microns. While 10 microns offers the highest smoothness, it significantly increases print time and the risk of failure. Finding a balance is key to efficiency.
Best Anti-Aliasing Settings for Jewelry 3D Printing
Anti-aliasing (AA) is a software technique that uses grayscale pixels to smooth out the jagged edges of a print.
- Grey Level: Higher levels help smooth the transition between pixels.
- Image Blur: Slightly blurring the slice edges can eliminate the pixel grid on the surface of the ring.
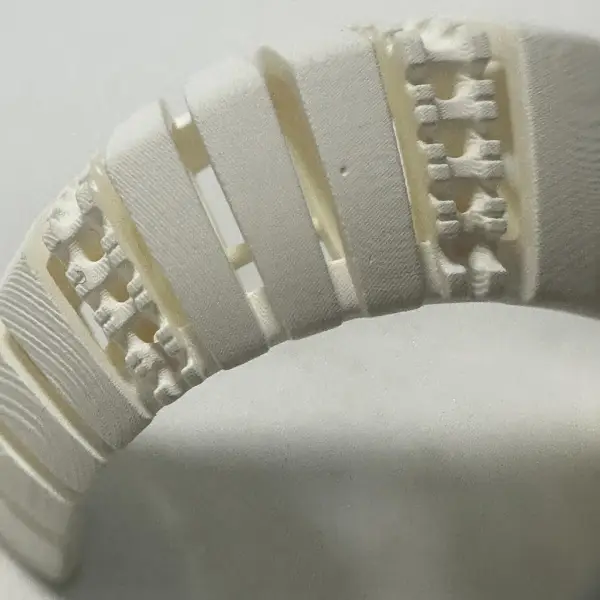
Orientation and Support Placement
Avoid placing large flat surfaces parallel to the build plate. Angling your jewelry at 30 to 45 degrees helps distribute the layer transitions more evenly. Ensure that supports are placed on the inner side of the ring or in areas that are easy to sand, preventing “pockmarks” on visible decorative surfaces.
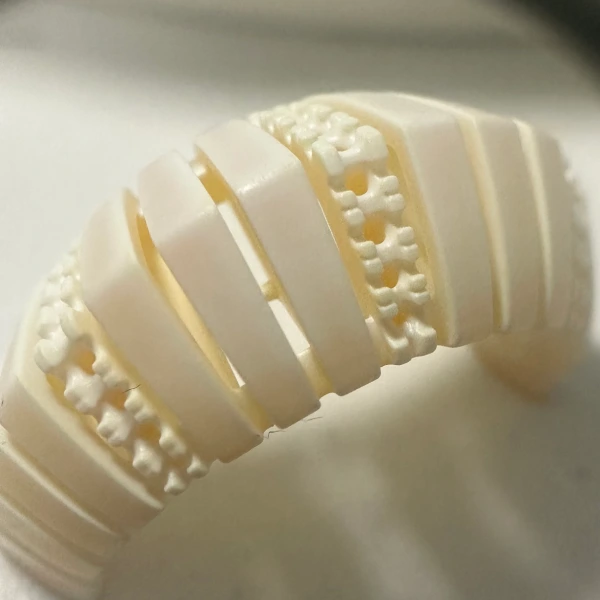
4. Material Selection for Castable Resin Smoothness
Not all resins are equal. For successful investment casting, use specialized jewelry resins. High-quality castable resins are formulated with a mix of liquid wax and photopolymers. These materials offer better castable resin smoothness because they have lower shrinkage rates and higher viscosity, which helps in filling micro-gaps between layers during the curing process.
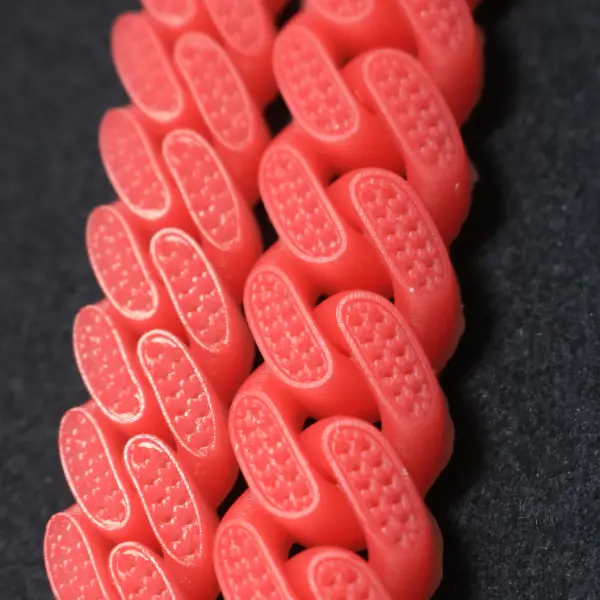
5. The Professional Post-Processing Workflow
Even a perfect print requires a disciplined post-print routine to ensure a jewelry-grade finish.
- Precise Cleaning: Use high-purity Isopropyl Alcohol (IPA) or specialized tripropylene glycol monomethyl ether (TPM). An ultrasonic cleaner is recommended to remove uncured resin from intricate filigree.
- Controlled Post-Curing: Over-curing can make the resin brittle and cause surface cracking. Use a dedicated UV cure station with a rotating platform for even exposure.
- Mechanical Polishing: Start with 400-grit wet sandpaper to remove support nibs, then progress to 2000-grit. For complex geometries, a magnetic tumbler or a rotary tool with a soft buffing wheel works best.
- Chemical Smoothing: Some resins respond well to a quick dip in specific solvents or a light coating of UV-curable spray to fill in remaining micro-lines before the casting process begins.
Summary Checklist for Success
- Select a printer with high XY Resolution (DLP or 8K+ LCD).
- Use a 25-35 micron layer height.
- Enable Anti-Aliasing with a Grey Level of 4 or higher.
- Angle the model at 35 degrees to minimize the staircase effect.
- Clean thoroughly in fresh IPA to ensure no residual resin hardens into bumps.
By following this jewelry 3D printing optimization strategy, you can produce models that require minimal cleanup, preserving the fine details of your CAD designs and ensuring a high-quality final metal product.

